How to replace a toilet
Short answer
To replace a toilet like-for-like: measure the rough-in and buy a toilet made for it, close the valve behind the toilet and prove it holds, drain the old toilet and lift it out with a helper, check the flange and the floor, set new bolts and a new seal, lower the new bowl straight down and bolt it evenly, connect a new supply line, then watch for leaks for a day before you caulk the front and the sides. Difficulty 3 of 5; for a first-timer, plan on about half a day. Read the “Stop here” box below before step 1.
Draft guide written from standard practice, not yet reviewed by a licensed pro. Follow product labels where they differ.
Difficulty 3 of 5 · about half a day · careful
Stop here
Photo of your room, the look you pick, then this guide with the materials counted for your room.
What you need
- Toilet made for your rough-in
- Toilet seal: wax ring or waxless seal
- Closet bolts with washers and caps
- Toilet supply line
- Toilet shims
- Kitchen and bath silicone caulk
Tools
- Adjustable wrench
- Putty knife, for the old wax
- Mini hacksaw or oscillating tool, for a seized bolt
- Torpedo level
- Tape measure
- Sponge, bucket, old towels, and a wet/dry vacuum if you have one
- Rubber gloves
- A helper to lift the toilets
Step by step
Step 1 of 11
Read the stop-gate, then look at the valve and the floor
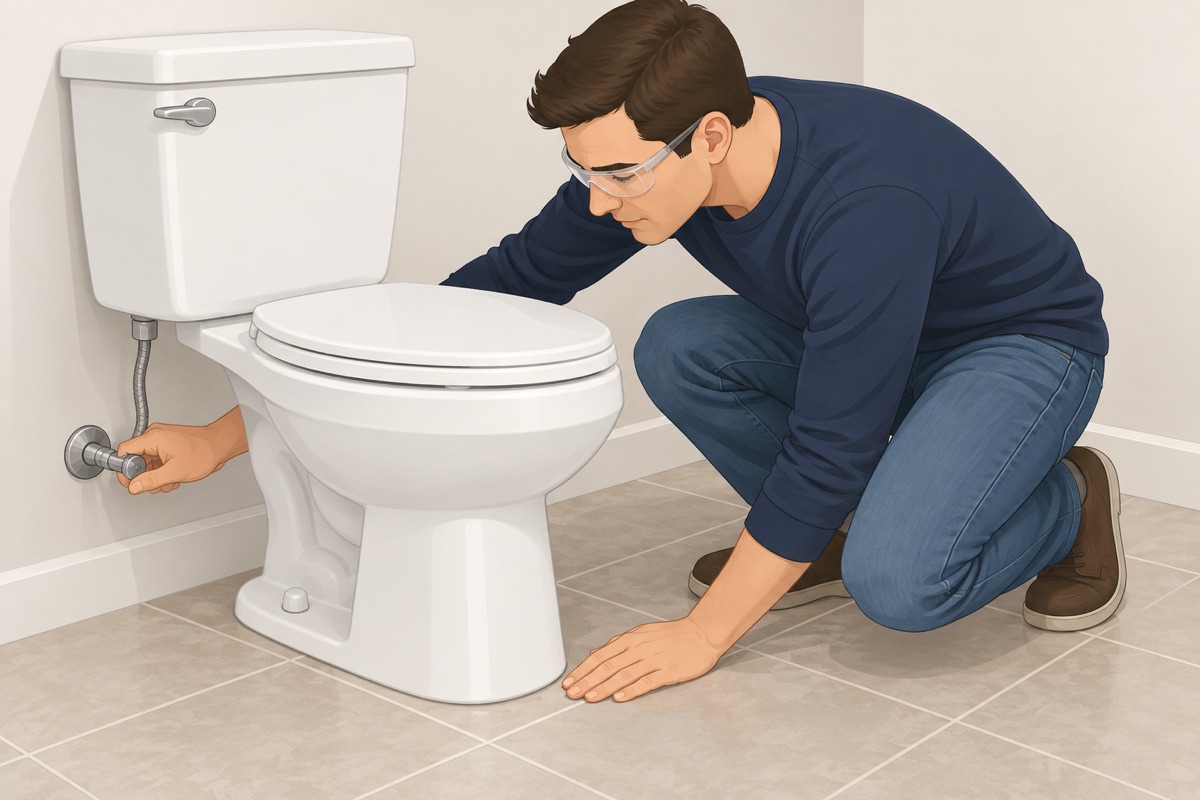
This job sets a new toilet on the same drain, in the same spot, on the same valve. Look at the shutoff valve behind the toilet: it should turn by hand. Press on the floor all around the base and look for dark stains, cracked tile, or a soft spot. Anything on the stop-gate list goes to a plumber or a flooring pro before this job.
Step 2 of 11
Measure the rough-in and the supply line
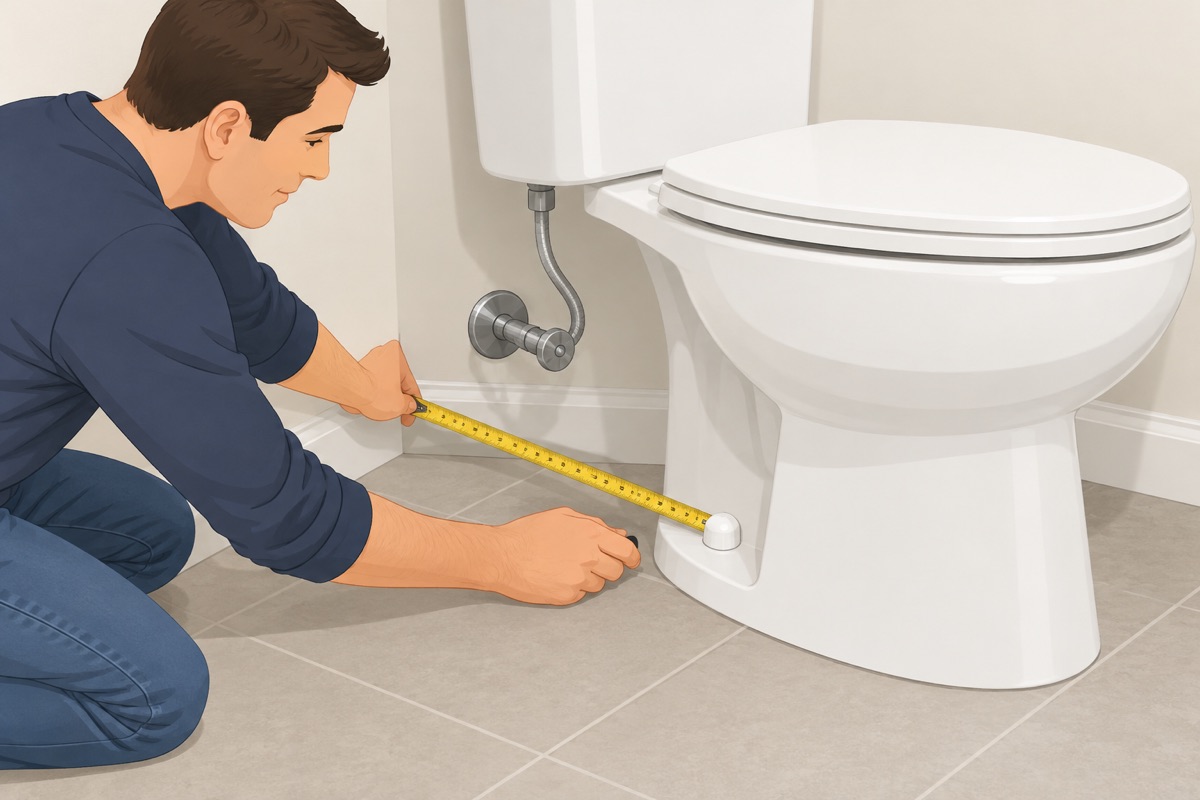
Measure from the finished wall behind the toilet, not the baseboard, to the center of one of the bolt caps at the base. That is your rough-in, usually 12 in, sometimes 10 or 14 in; buy a toilet made for it — the box and the spec sheet say which. Measure from the valve to where the tank's fill valve will be, for the supply line.
Step 3 of 11
Water off at the toilet and prove it
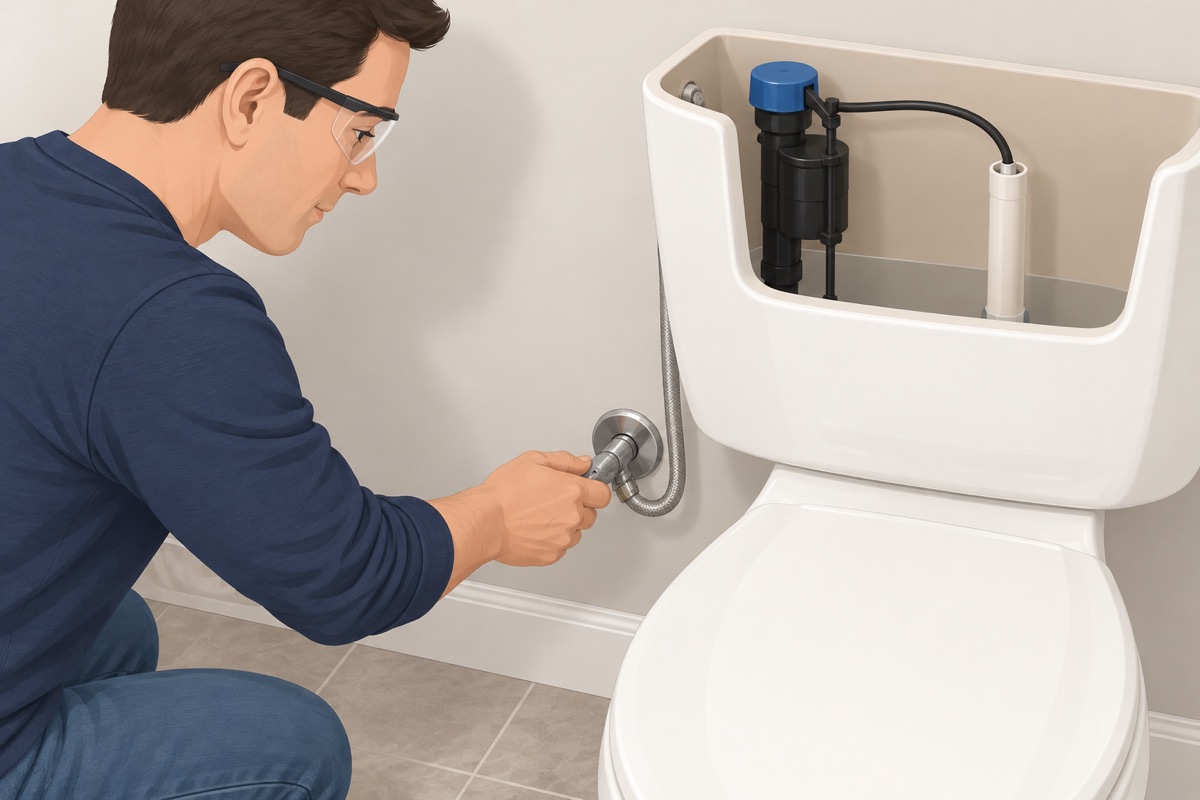
Close the shutoff valve behind the toilet gently, clockwise, until it stops. Flush and hold the lever down: the tank empties and should not refill. Wait a few minutes and look again: no water coming into the tank, no drip at the valve stem. If the valve will not close fully, weeps, or will not turn, stop here — a plumber replaces it before the toilet comes off. Find the home's main shutoff before you go on.
Safe to start?
- The shutoff valve closes fully: the tank stays empty and nothing drips at the valve stem
- You know where the home's main water shutoff is
- The new toilet is made for your rough-in, and a new seal, new bolts, and a new supply line are on hand
- The floor around the toilet is firm, with no soft spot or dark stain
- A helper is here to lift, and the way out of the bathroom is clear
Step 4 of 11
Empty the tank and the bowl
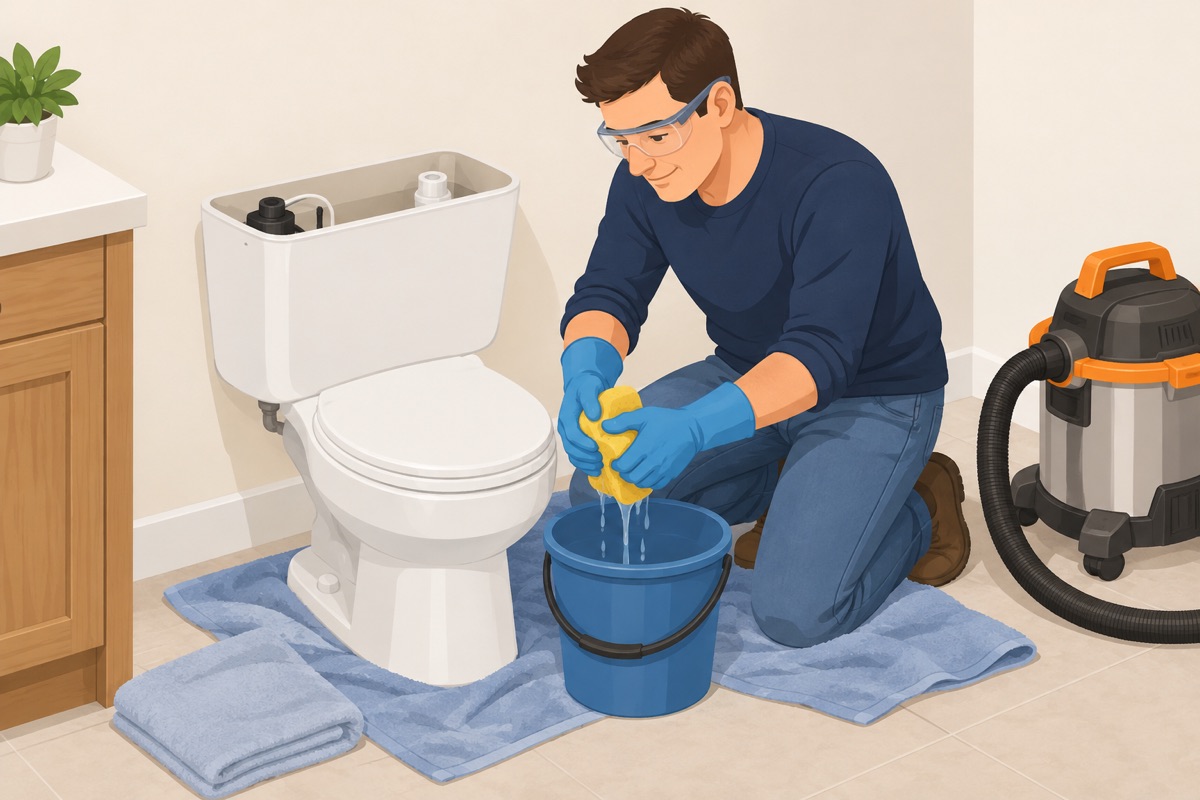
With the valve closed, flush and hold the lever down. Wearing gloves, sponge the last water out of the tank, then out of the bowl — a wet/dry vacuum is faster. A dry toilet is lighter and leaves no mess on the way out. If a fixtures-removal job in your plan already took the old toilet out, skip to step 6.
Step 5 of 11
Disconnect the supply, unbolt, and lift the old toilet out
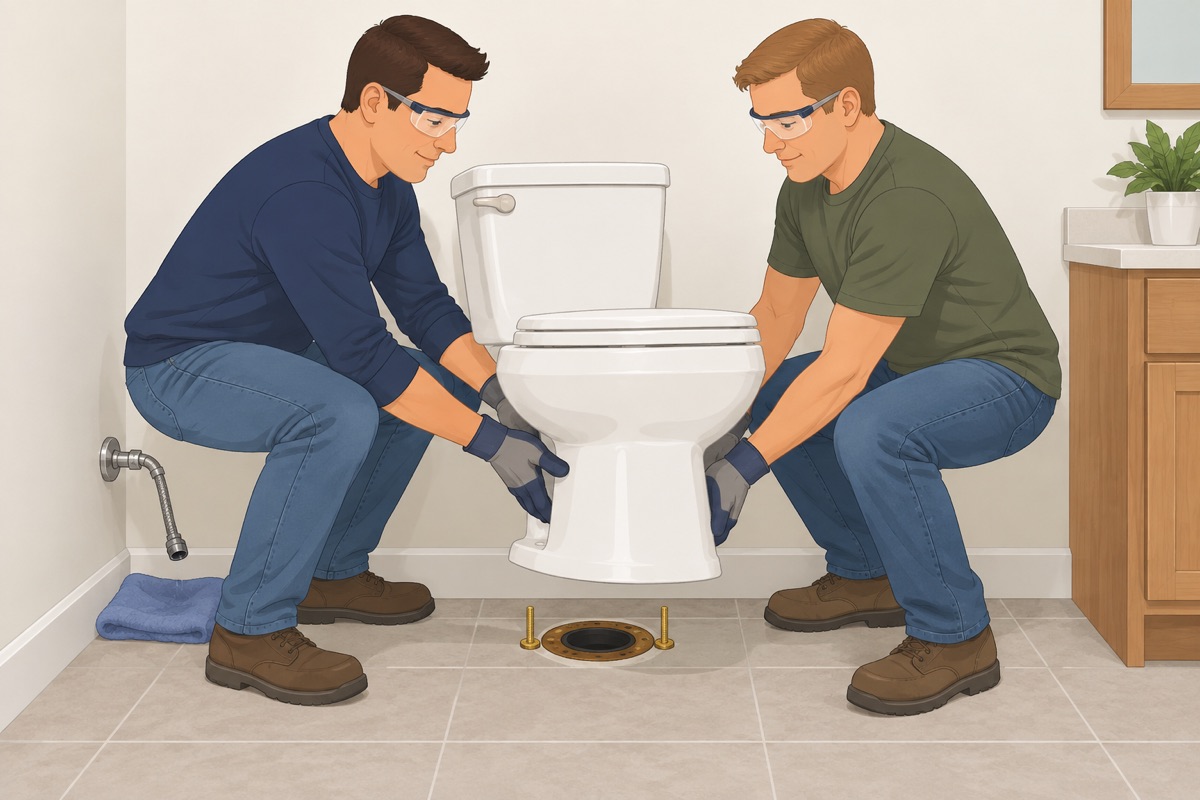
Towel under the valve; undo the supply line at the tank, then at the valve. Pop the caps off the bolts at the base and undo the nuts; cut a seized bolt with the mini hacksaw rather than twisting the porcelain. Rock the bowl gently side to side to break the seal, then lift it straight up with your helper and set it on old towels or cardboard. Stuff a rag into the drain right away, with a corner hanging out, so no sewer gas comes up and nothing falls in.
Step 6 of 11
Scrape the flange and look hard at it and the floor
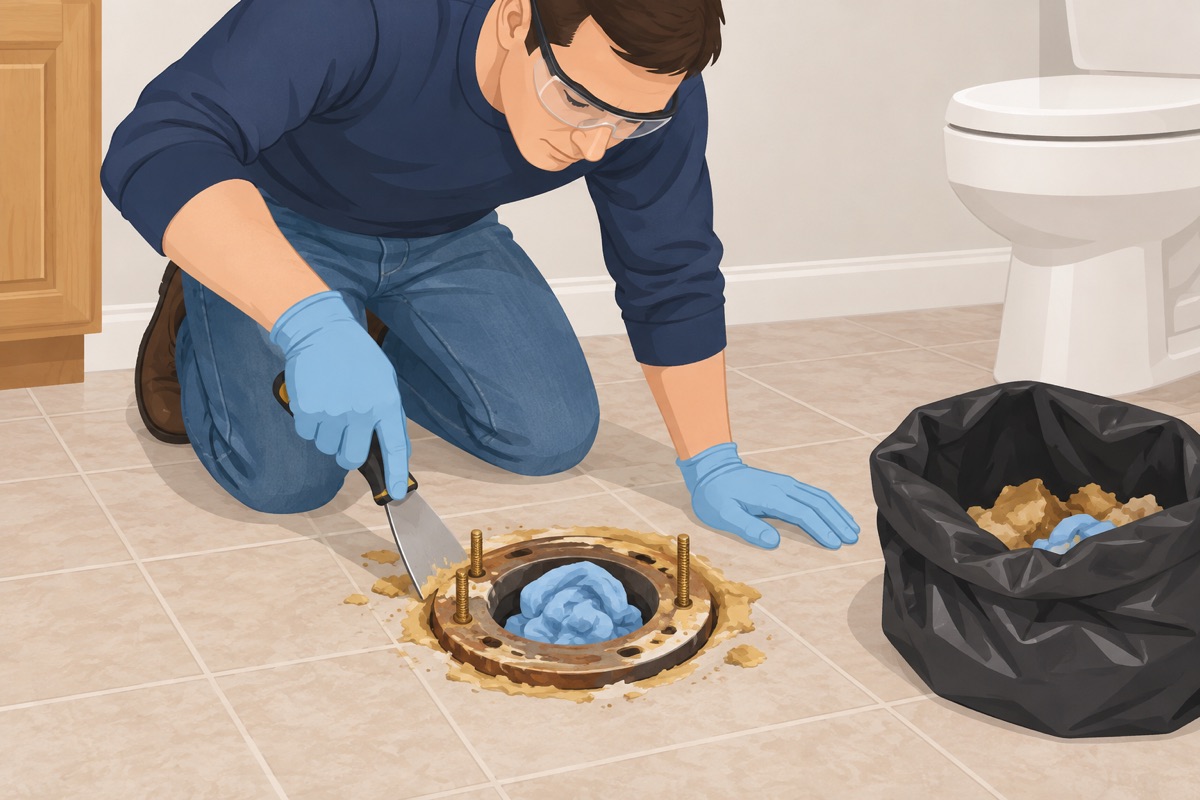
Scrape the old wax off the flange and the floor with the putty knife and bag it. Look at the flange: cracked, broken at the bolt slots, loose from the floor, or far below the finished floor is a stop — see the stop-gate. A flange a little below the finished floor takes a thicker seal or a flange extender kit made for that, per its package. Press the floor around the flange: soft or dark wood is a repair before the toilet goes back. In a home from before 1980, do not scrape or break old flooring or its adhesive around the flange — test first.
Before the new toilet goes down
- The flange is whole, tight to the floor, and its bolt slots are sound
- The flange sits at or just above the finished floor — or you have the thicker seal or the extender kit made for a low one
- The floor around the flange is firm and dry, with no soft or dark wood
- Old flooring and adhesive around the flange were left alone, or the home is from 1980 or later, or they tested negative for asbestos
Step 7 of 11
Set the new bolts and the new seal
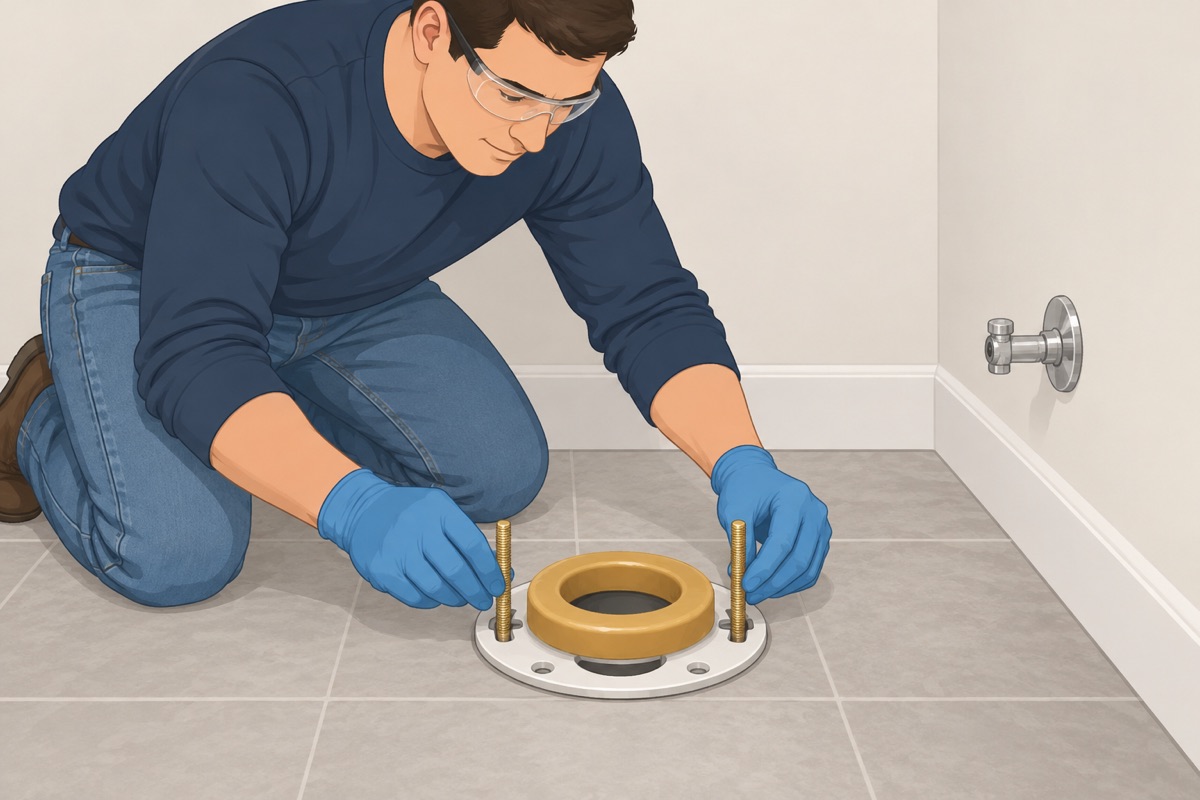
Slide the new closet bolts into the flange slots and hold them upright with their washers, lined up parallel to the wall. Fit the new wax ring or waxless seal the way its package says — on the flange or on the toilet's outlet. Pull the rag out of the drain just before the bowl goes down.
Step 8 of 11
Lower the bowl straight down and bolt it evenly
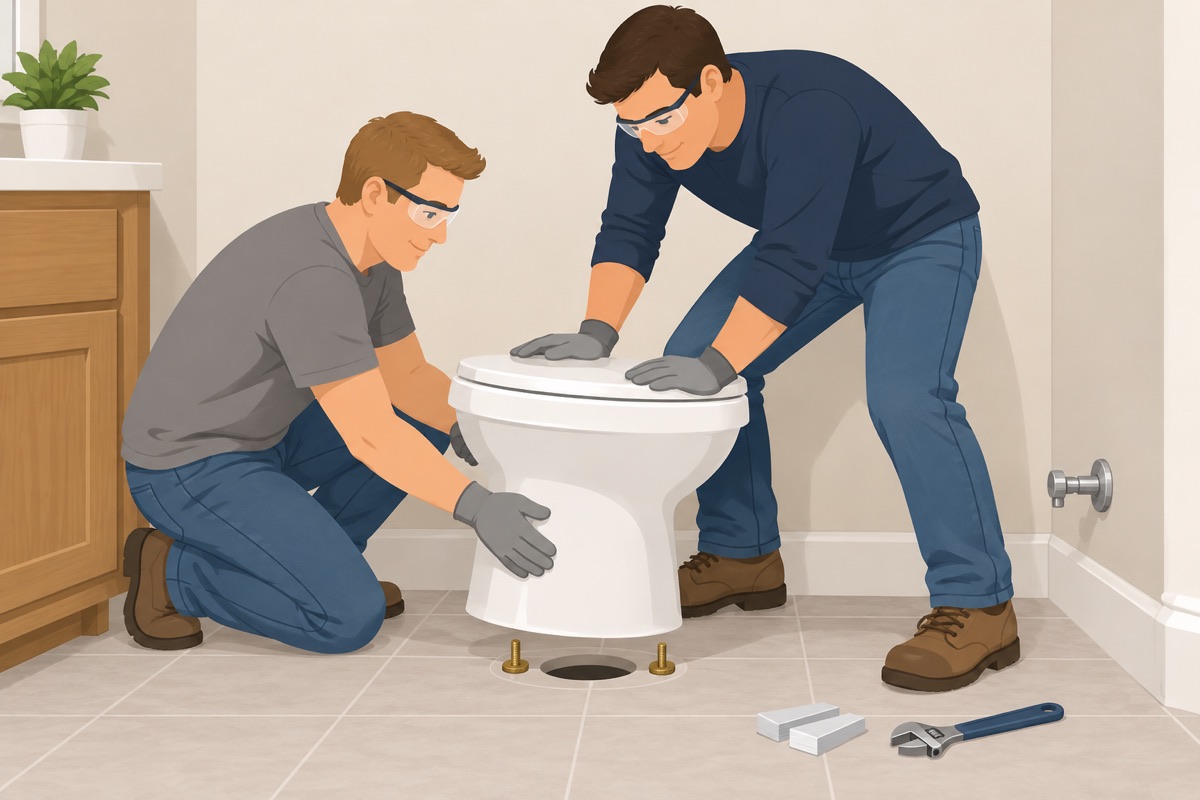
With your helper, lower the bowl straight down over the bolts in one motion, without sliding or twisting. Press down on the rim with your weight to seat the seal. If the bowl rocks, slip shims under it. Put on the washers and nuts and tighten them a few turns at a time, side to side, until the bowl is firm — then stop. Check it is level side to side and front to back. If you had to lift it again, use a new seal.
Step 9 of 11
Set the tank and connect the new supply line
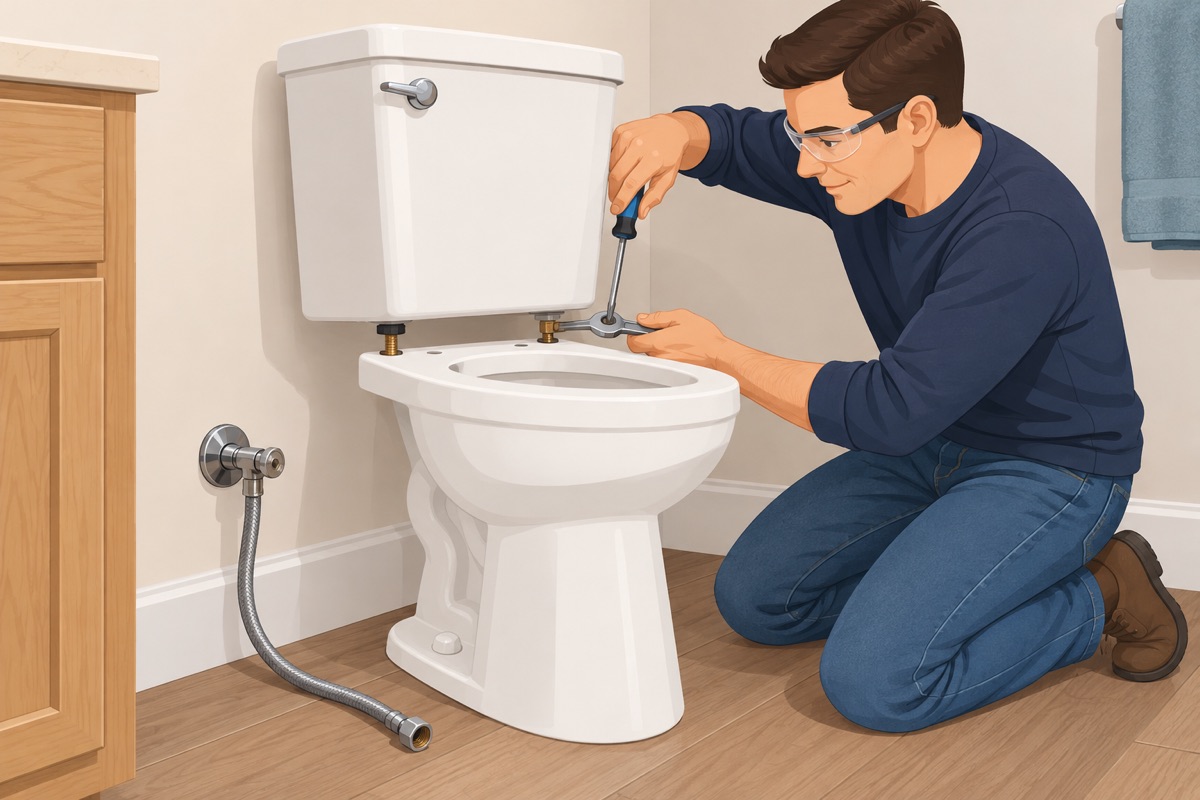
Two-piece toilet: fit the tank gasket and the tank bolts the way the instructions say, and tighten the bolts a little at a time, side to side, until the tank sits level and firm on the bowl. Connect the new supply line to the fill valve and to the shutoff valve hand-tight, then give it the small extra turn its package says — no thread tape on compression fittings. Fit the seat.
Step 10 of 11
Water on slowly and test
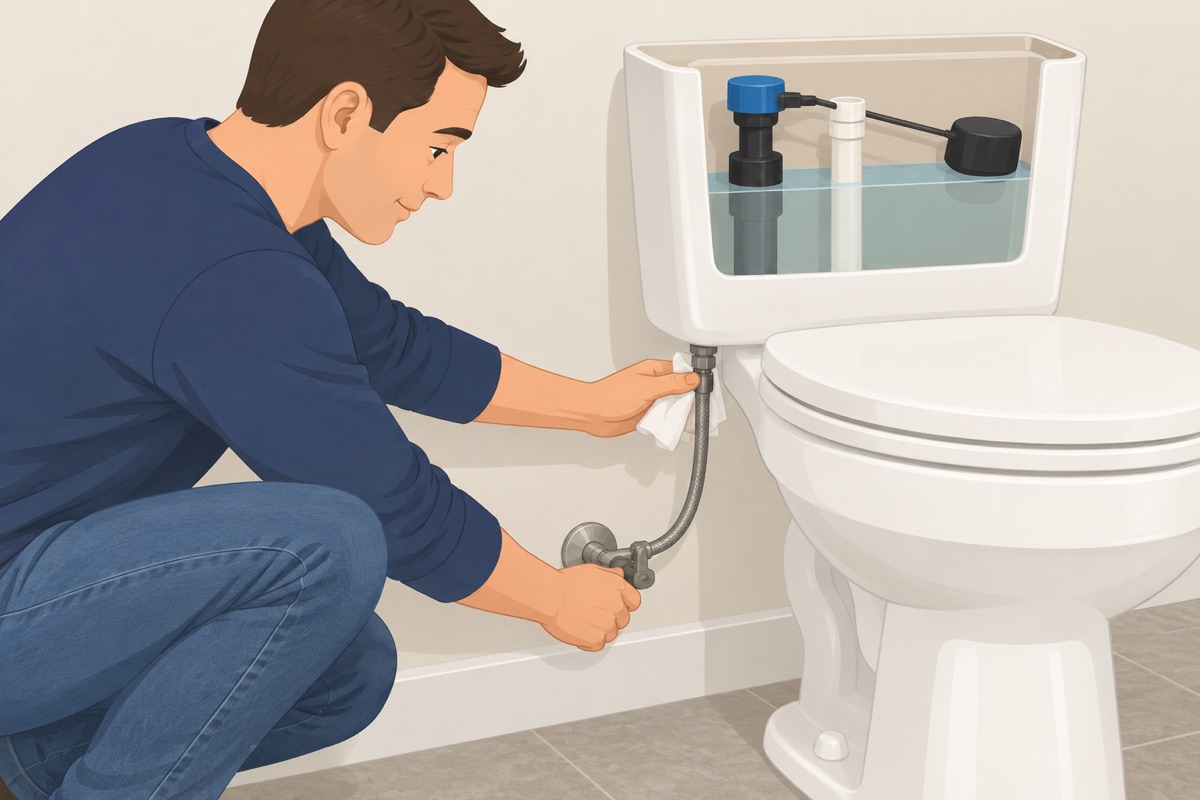
Open the valve slowly. Let the tank fill and set the water level to the mark inside the tank, as the instructions say. Flush several times while you watch the supply nut, the tank bolts, and the base with a dry paper towel. Lay dry paper towels around the base and under the valve, and look again after an hour and the next day — a slow leak shows only with use.
Step 11 of 11
Caulk the base — front and sides only
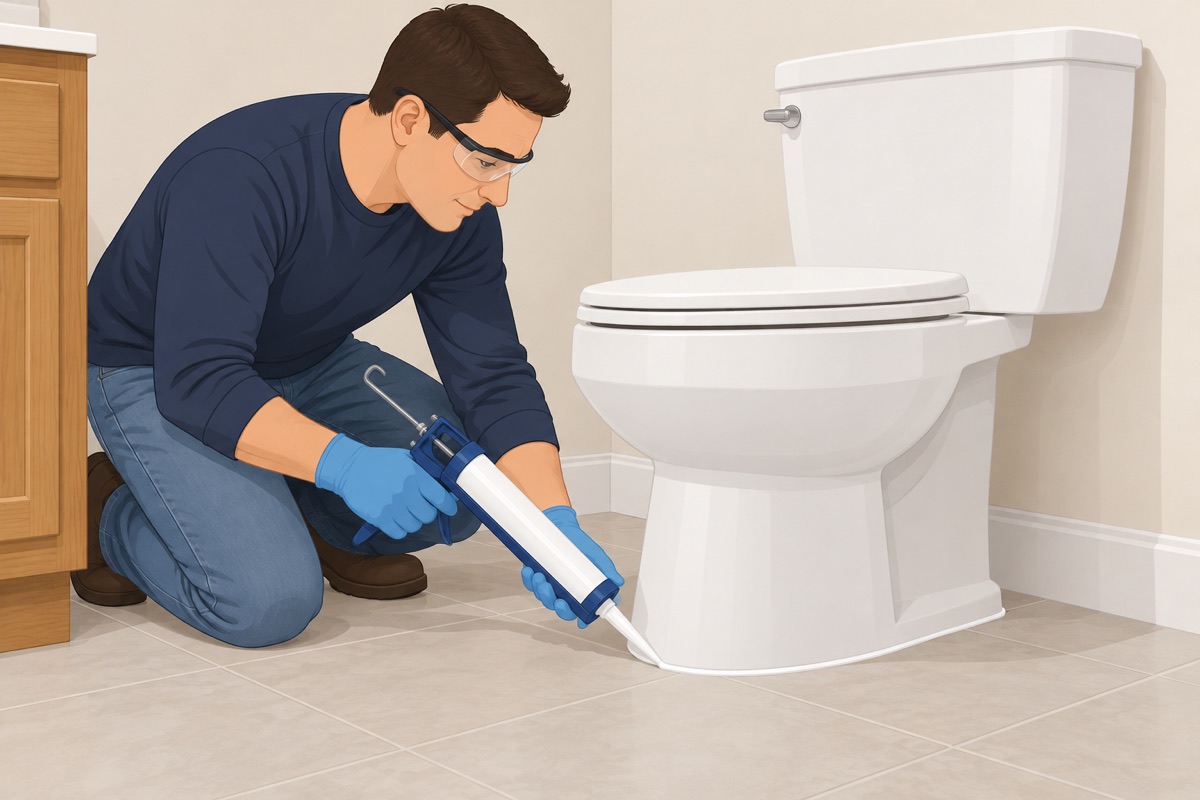
Once the toilet has stayed dry for a day of use, run a thin bead of silicone around the front and the sides of the base where it meets the floor. Leave the back open, so a failed seal shows on the floor instead of soaking the subfloor. If an inspector requires the full base caulked, do what the inspector says.
Quality check
- The toilet does not rock in any direction; the bolts are snug and capped
- No drip at the supply line, the valve, the tank bolts, or the base after a day of use
- The tank fills to the mark, the flush is strong, and the fill valve shuts off
- The shutoff valve still closes fully
- The base is caulked at the front and sides and open at the back — or all around if your inspector requires it
Common mistakes
- Forcing an old shutoff valve. An old multi-turn valve behind a toilet often snaps or starts leaking at the stem the moment you lean on it, and then the water cannot be closed at the toilet. If it will not close gently and fully, stop: a plumber replaces it before the toilet comes off. Mistake #1 in this task.
- Buying a toilet for the wrong rough-in. Measure from the finished wall, not the baseboard, to the center of the bolts. A toilet made for another rough-in either will not fit against the wall or leaves a wide gap behind the tank.
- Reusing a seal, or lifting the bowl after it is set. A wax ring seals once. If you lift or slide the bowl after it has pressed into the wax, take it off and start again with a new seal.
- Cranking the bolts. Porcelain cracks under heavy or uneven pressure. Tighten the nuts a few turns at a time, side to side, until the bowl is firm, then stop. The same goes for the tank bolts.
- Caulking all the way around the base. Leave the back open. If the seal ever fails, the water then shows on your floor instead of soaking the subfloor where you cannot see it. If an inspector requires the full base caulked, do what the inspector says.
Questions
How do I replace a toilet myself?
Close the shutoff valve behind the toilet and flush: the tank must stay empty. Sponge the tank and the bowl dry, undo the supply line, take the nuts off the closet bolts, rock the bowl to break the seal and lift it straight up with a helper, then plug the drain with a rag. Scrape the old wax, check the flange and the floor, set new bolts and a new seal, lower the new bowl straight down, tighten the nuts a few turns at a time side to side, connect a new supply line, and test.
How do I measure the rough-in for a new toilet?
Measure from the finished wall behind the toilet, not the baseboard, to the center of one of the bolt caps at the base. It is usually 12 in, sometimes 10 or 14 in. Buy a toilet made for that rough-in: one made for another either will not fit against the wall or leaves a wide gap behind the tank.
Should I caulk around the base of a toilet?
Yes, at the front and the sides, with a thin bead of silicone once the toilet has stayed dry for a day of use. Leave the back open, so if the seal ever fails the water shows on your floor instead of soaking the subfloor. If an inspector requires the full base caulked, do what the inspector says.
When should I stop and call a pro?
Like-for-like only: a new toilet on the same drain, in the same spot, on the same supply valve. Stop and call a plumber if: the shutoff valve behind the toilet will not close all the way, weeps at the stem, or will not turn — forcing an old valve usually breaks it; the flange is cracked, broken at the bolt slots, loose from the floor, or sits so far below the finished floor that the pipe would have to be cut or reset; the new toilet is made for a different rough-in than yours; or anything would mean moving the drain or the supply line in the wall or the floor. Stop and get the floor repaired first if the floor around the toilet is soft, stained dark, or gives when you press it — a rotted subfloor is fixed before any toilet goes back down. A toilet is heavy and awkward, and porcelain breaks with sharp edges: lift with a helper, bend your knees, and wear gloves. In a home from before 1980, old floor tile or sheet flooring and the adhesive under it may contain asbestos: do not scrape, sand, or break it around the flange — have it tested first.
You may also need
- How to install a faucet, toilet and shower head yourself: step by step
- How to install a bathroom vanity and sink yourself: step by step
- How to tile a bathroom or kitchen floor yourself: step by step
- How to remove a toilet, vanity and faucets yourself: step by step
- How to install a closet system yourself: step by step